Sketching in time
“Since they need to be able to capture the essence of design concepts around transitions, dynamics, fell, phrasing, and all the other unique attributes of interactive systems, sketches of interaction must necessarily be distinct from (traditional) types of sketches…†Bill Buxton: Sketching User Experiences
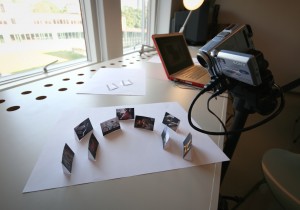
This week I have been involved in teaching a group of interaction design students at the Design for interactive and social media course at AHO. The topic has been ‘Sketching with time’, and has focused on using stop motion combined with paper prototyping to sketch interface ideas. The week’s assignment was to make a photo album interface and experiment with navimation.
Before introducing the students to the technique I had to try it out myself. I found the Mac application FrameByFrame which has been brilliant for this purpose. The functionality of the software is limited, but it is free, extremely simple to use, and serves the purpose for quick motion sketching.
Here are two of the quick stop motion sketches I made:
I also tried using video, recording my actions in real time:
The video quality is quite rough (partly because I am using a really old DV camera), but I don’t see this as a big problem. The technique is primarily to be used for quick sketches early in the design process.

The students got three days to make their video sketches. During these days many of the students managed to do a lot of experimentation and test out different ideas. The task was in many ways an experiment from our side, so I was positively surprised by the diversity and quality of their work. I also got the impression that they had learned a lot about timing, response and communication in the interface.
The technique has clearly some disadvantages – it is for example hard to make subtle movements and deal with details and many elements at the same time. However, it seems especially suited for 3D motion sketching, since this often requires a lot of time and skills to do on a computer.
UPDATE: see some of the videos the students made.
3 Comments to Sketching in time
[…] task to the students I tested the technique myself using the free Mac software FrameByFrame (see earlier blogpost). This is the first time we have instructed students to use stop motion, so the project was partly […]
Yesterday I started to use stop motion-sketching for one of my projects, inspired by your blog 🙂
I’ve read Bill Buxton’s “Sketching User Experiences” some time ago and found it to be very interesting and full of inputs for my work (I’m working in the user experience-team in a telecommunications company in Austria).
One question: I’m doing lots of sketching in Omnigraffle (very rough sketch-style wireframes). For some projects I’d like to use these wireframes directly for stop motion and skip the drawing part. Do you know programs that allow importing images in order to create stop motion movies?
Thank you again for your very interesting and inspiring blog!
Hi Jörg, great to hear from you.
If you simply want to put several image into a movie, there are lots of programs that can help you. If you only have a few images you can even use Power Point or Keynote. If you have lots of images you could use movie editing software, such as iMovie, Final Cut Pro, or Adobe Premiere Pro. Animation software like After Effects or Flash also works well. Otherwise, you can copy and paste graphics from OmniGraffle right into Keynote and animate the elements individually without making images first.
Leave a comment
Search
Recent posts
- SpotTrack: Award for Design Excellence
- VizBox Bergen og årets geogründer
- Fulbright report: six months at the School of Cinematic Arts in Los Angeles
- The VizBox Experiments
- TopoBox: exploring a tangible dataviz platform
- Norway in 3D part I: from DEM to 3D surface
- Using visualization for understanding survey data
- Story kicking big data
- Fulbright project: Dynamic Information Visualization
- Visiting Fulbright scholar at USC in Los Angeles
- (E)motional design paper at DANDE2012
- 3,5 års arbeid på 6 minutt og 40 sekund
- PhD thesis online
- New video: Kinetic Interface Design
- Presentasjon: Skisser utanfor boksen
November 27, 2009